User Settings
Overview
Open your personal settings screen from the user icon in the header → "User Settings".
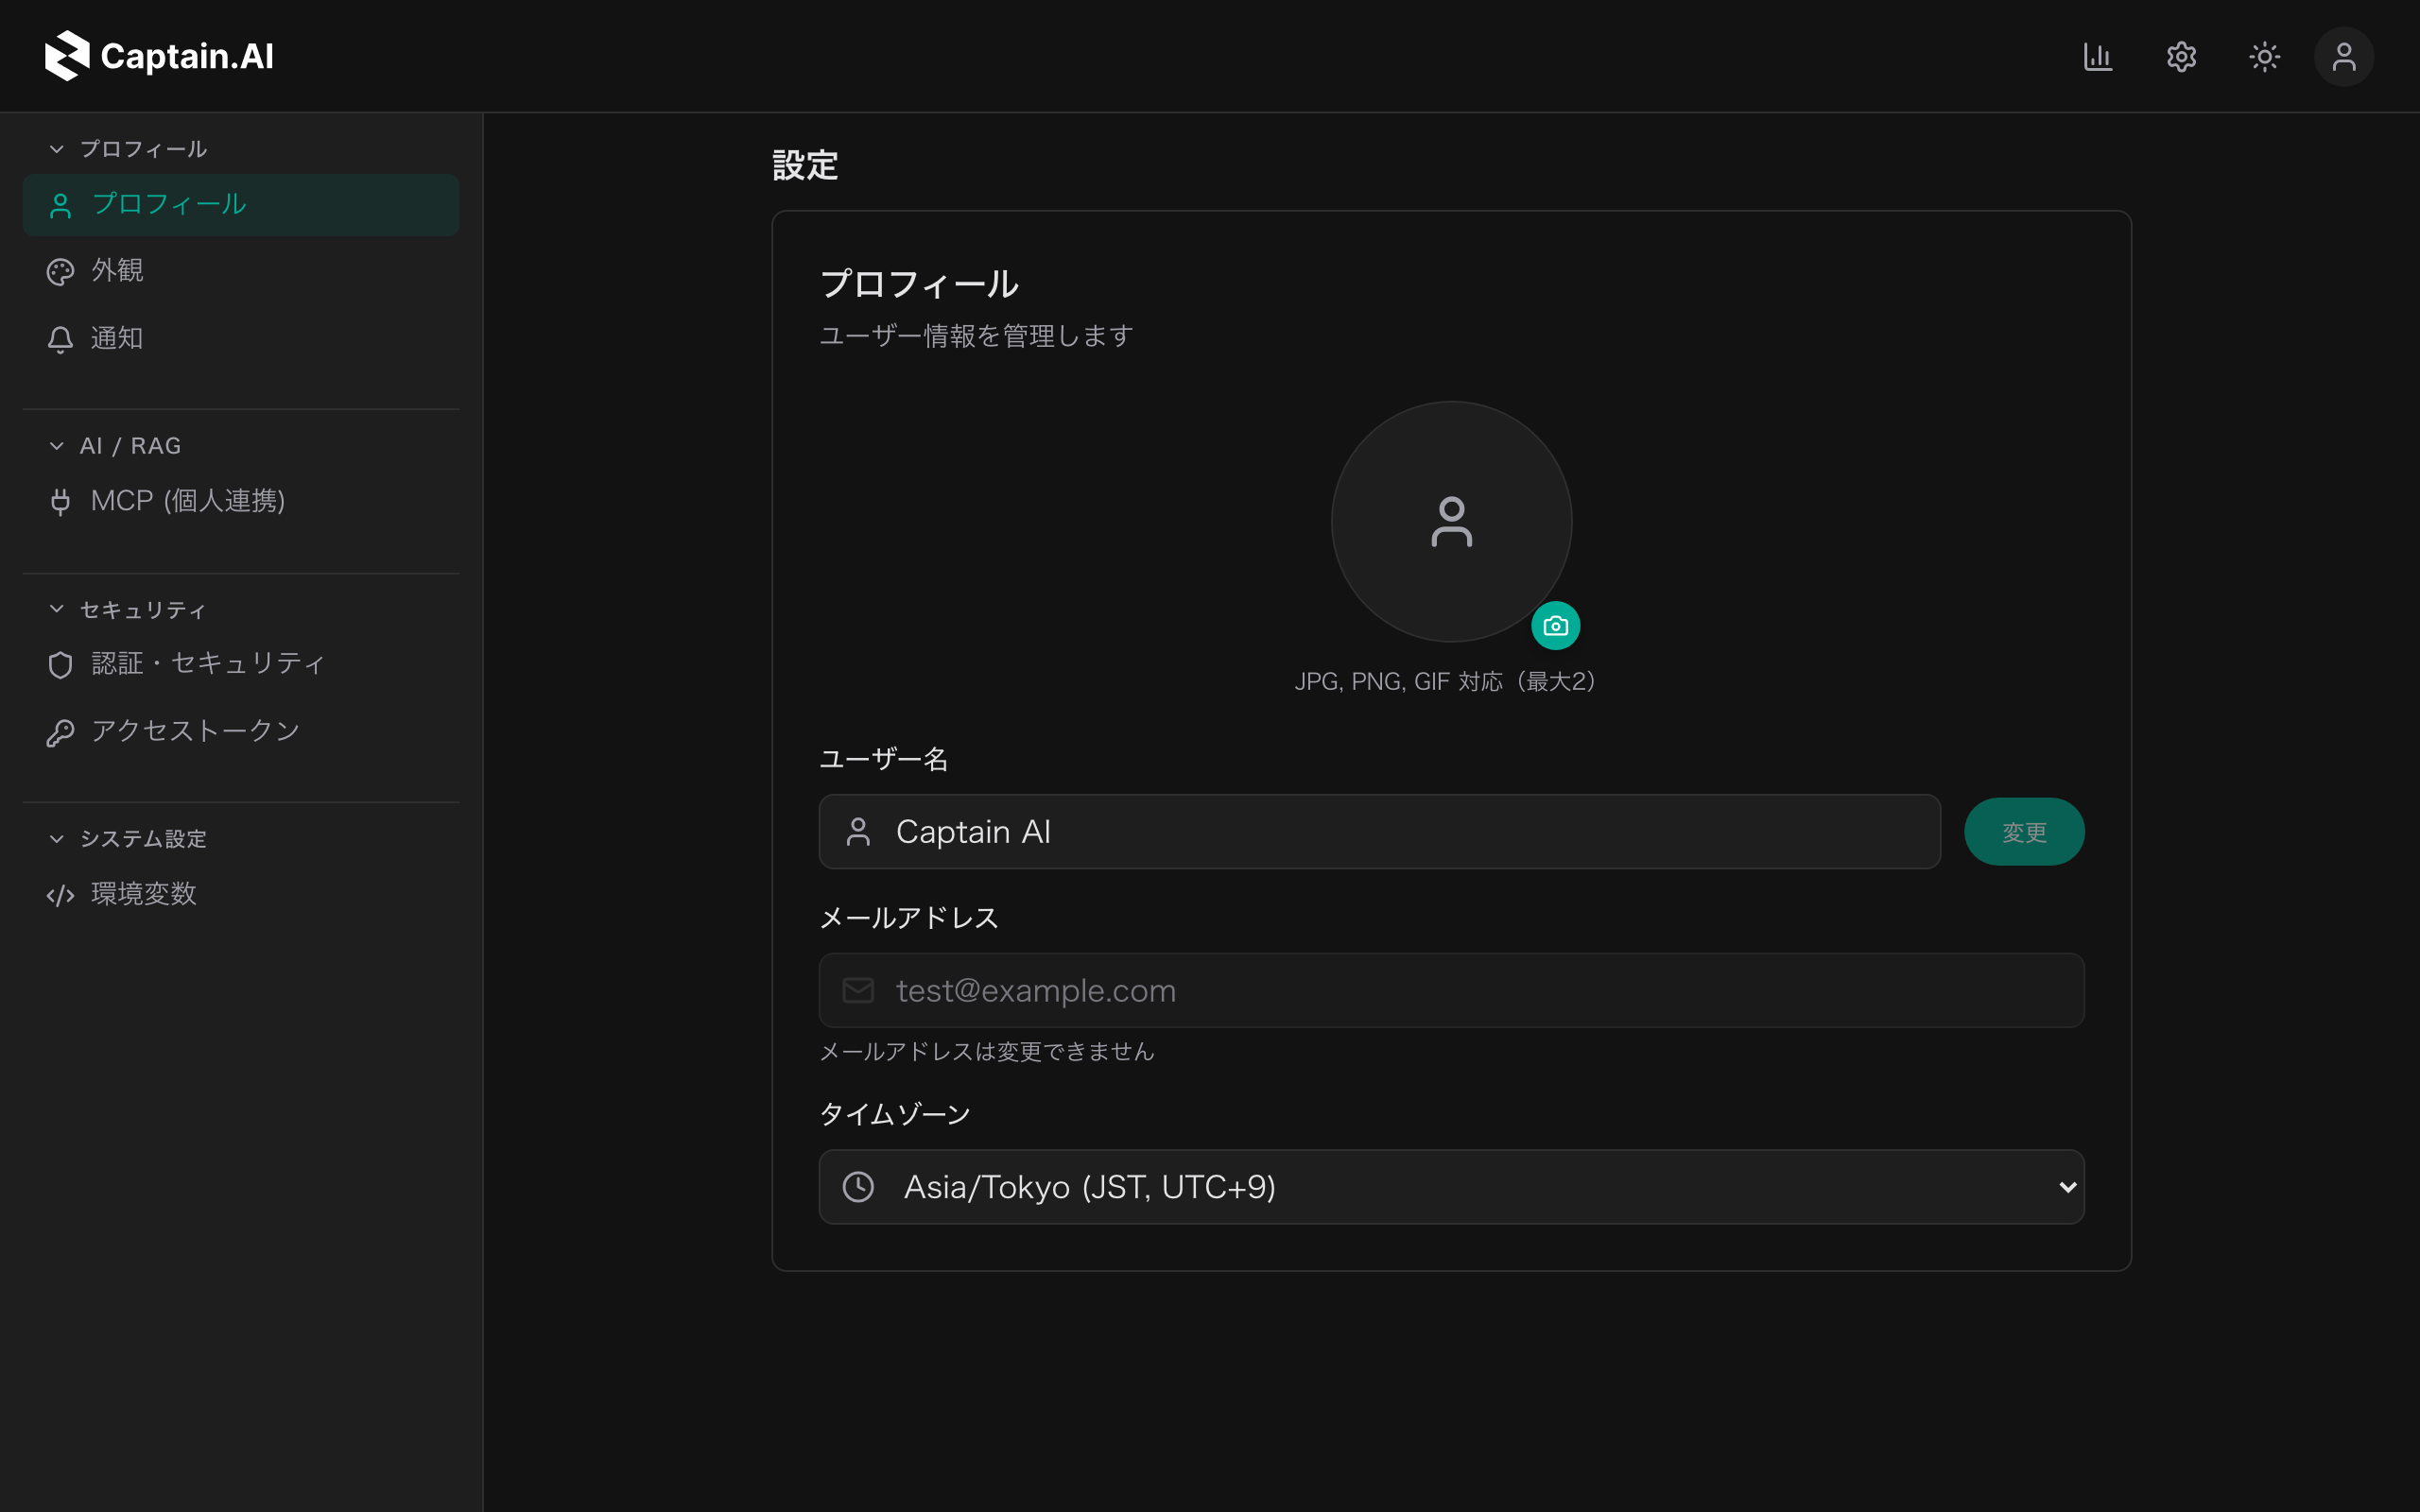
The settings are organized into the following groups.
| Group | Sections |
|---|---|
| Profile | Profile / Appearance / Notifications |
| AI / RAG | Personalization / My Memory / Personal knowledge / MCP (personal) |
| Security | Authentication & Security / Access Tokens |
| System | Environment Variables |
Note: The sections in the "AI / RAG" group appear depending on the organization settings (whether the knowledge base and memory features are enabled). If disabled, the entire group is hidden.
Profile
Displayed information
- Username: enter a name and save with "Change"
- Email address: display only; cannot be changed
- Timezone: saved immediately when selected
Avatar
- Click the avatar change button and select an image (JPG / PNG / GIF / WebP, up to 5MB)
- Use "Adjust Avatar" to zoom in / out and set the crop position
- Save with "Apply" (use "Delete" to restore the default)
Appearance
- Theme: two options, "Dark" and "Light". You can also change it from the theme toggle icon in the header
- Language: switch between "日本語" and "English"
- Log display: turn on "Show detailed execution logs" to see detailed tool execution logs (command runs, file edits, etc.) while the AI is working (off by default, showing only a simple progress indicator)
Notifications
Configure browser notifications for completed processing and questions from the AI, along with completion and question sounds. See Background Tasks and Notifications for details.
Personalization
Tell the AI about your role and preferred response style. Once set, it is automatically applied across all your chats, so you no longer need to type the same preamble every time.
| Item | Contents |
|---|---|
| Tell us about yourself | Your title, role, responsibilities, etc. (e.g., accounting manager, uses freee, company of about 50 employees). You can also insert samples with a click |
| AI response style | E.g., "Conclusion first. No preamble. Prefer bullet points." Presets available (Concise / Executive / Engineer / Polite & textbook-style) |
| Apply to personal chats | Whether to apply your introduction and response style in personal chats (does not affect chats inside a project) |
| Project to open on login | Specify the project that opens automatically right after login |
If your organization administrator has set forced rules (guardrails), their contents are displayed read-only.
My Memory
Manage personal memory that only you can reference. Register rules and preferences you want remembered across conversations.
- "Use memory": when off, saved memories are not referenced in conversations
- "Add memory": choose a type (Facts / preferences, Events, Procedures / rules) and register the content
- Each memory can be pinned or deleted. You can also open the full management screen from "Open My Memory manager"
For saving from within a chat with "Remember this", see "Saving memory" in Chat.
Personal knowledge
Manage knowledge bases that only you can use. Register materials such as PDFs, and the AI will reference their contents when answering in personal chats.
- Create a container with "Create knowledge base"
- Upload files from "Add document" (PDF / Markdown / text, up to 50MB per file)
- Check each document's processing status (Available / Processing / Error)
- Use the "Use personal knowledge in personal chats" toggle to turn searching on / off (does not affect chats inside a project)
- Project-level knowledge is managed in Projects
MCP (personal)
Manage your personal credentials for external tool integrations (MCP servers).
- For shared MCP servers allowed by your organization administrator, you can set your own tokens and environment variables and use "Enable for me"
- From "Add your own MCP", you can register an MCP server that only you use (display name / server URL / auth method: No auth, API key, or Custom header)
Integration with servers requiring OAuth authentication is planned for a future release.
Authentication & Security
Changing your password
- Click "Change" in the password field
- Enter your current password and a new password (at least 8 characters)
- Click "Change Password"
Two-factor authentication (2FA)
You can set up two-factor authentication using an authenticator app (Google Authenticator, Microsoft Authenticator, etc.). For setup steps and backup code details, see Authentication & Security.
SSO linking
If SSO is enabled for your organization, you can link your Google / Microsoft account (only one provider can be linked). Unlinking switches you back to password-based login.
Git integration
Configure credentials for working with Git repositories in jobs.
- Click "Configure" in the Git integration section
- Select a provider (GitHub / GitLab) (for self-hosted instances, also enter the host URL)
- Enter your access token (PAT) and verify connectivity with "Test Connection" (on success, the committer name and email are filled in automatically)
- Click "Save"
The token is encrypted before storage. You can remove the integration at any time with "Disconnect".
Access Tokens (PAT)
Manage tokens for accessing the API from external systems.
Creating a token
- Click "Create new token"
- Specify a token name and expiration (30 days / 90 days / 365 days / No expiration), then click "Create"
- Copy the displayed token
Important: The token is shown only at creation time. It is also bound to the workspace it was issued in (check the "Workspace:" indicator in the list).
Managing tokens
- You can have up to 10 active tokens
- Use the pencil icon to change a token's name and expiration later
- Use the trash icon to revoke a token (all authentication using that token will fail)
For how to use the API, see External API Integration.
Environment Variables
Manage user-specific environment variables used when running jobs (agents).
- Register a key and value with "Add Environment Variable"
- Check "Treat as secret" to store the value encrypted and mask it in the list (toggle visibility with the eye icon)
- Additions, edits, and deletions take effect when you click "Save"
Key names must start with a letter or underscore and may contain only alphanumeric characters and underscores. If a key with the same name is defined at the project or job level, that setting may take precedence.