User Management (for Administrators)
Overview
Manage the accounts of the users who use Captain.AI: invitations, bulk creation via CSV, and changes to permissions and status.
Note: This feature is available to organization administrators only.
User List
Open the gear icon in the header → "Settings" → the "Users & Permissions" category → the "Users" tab.
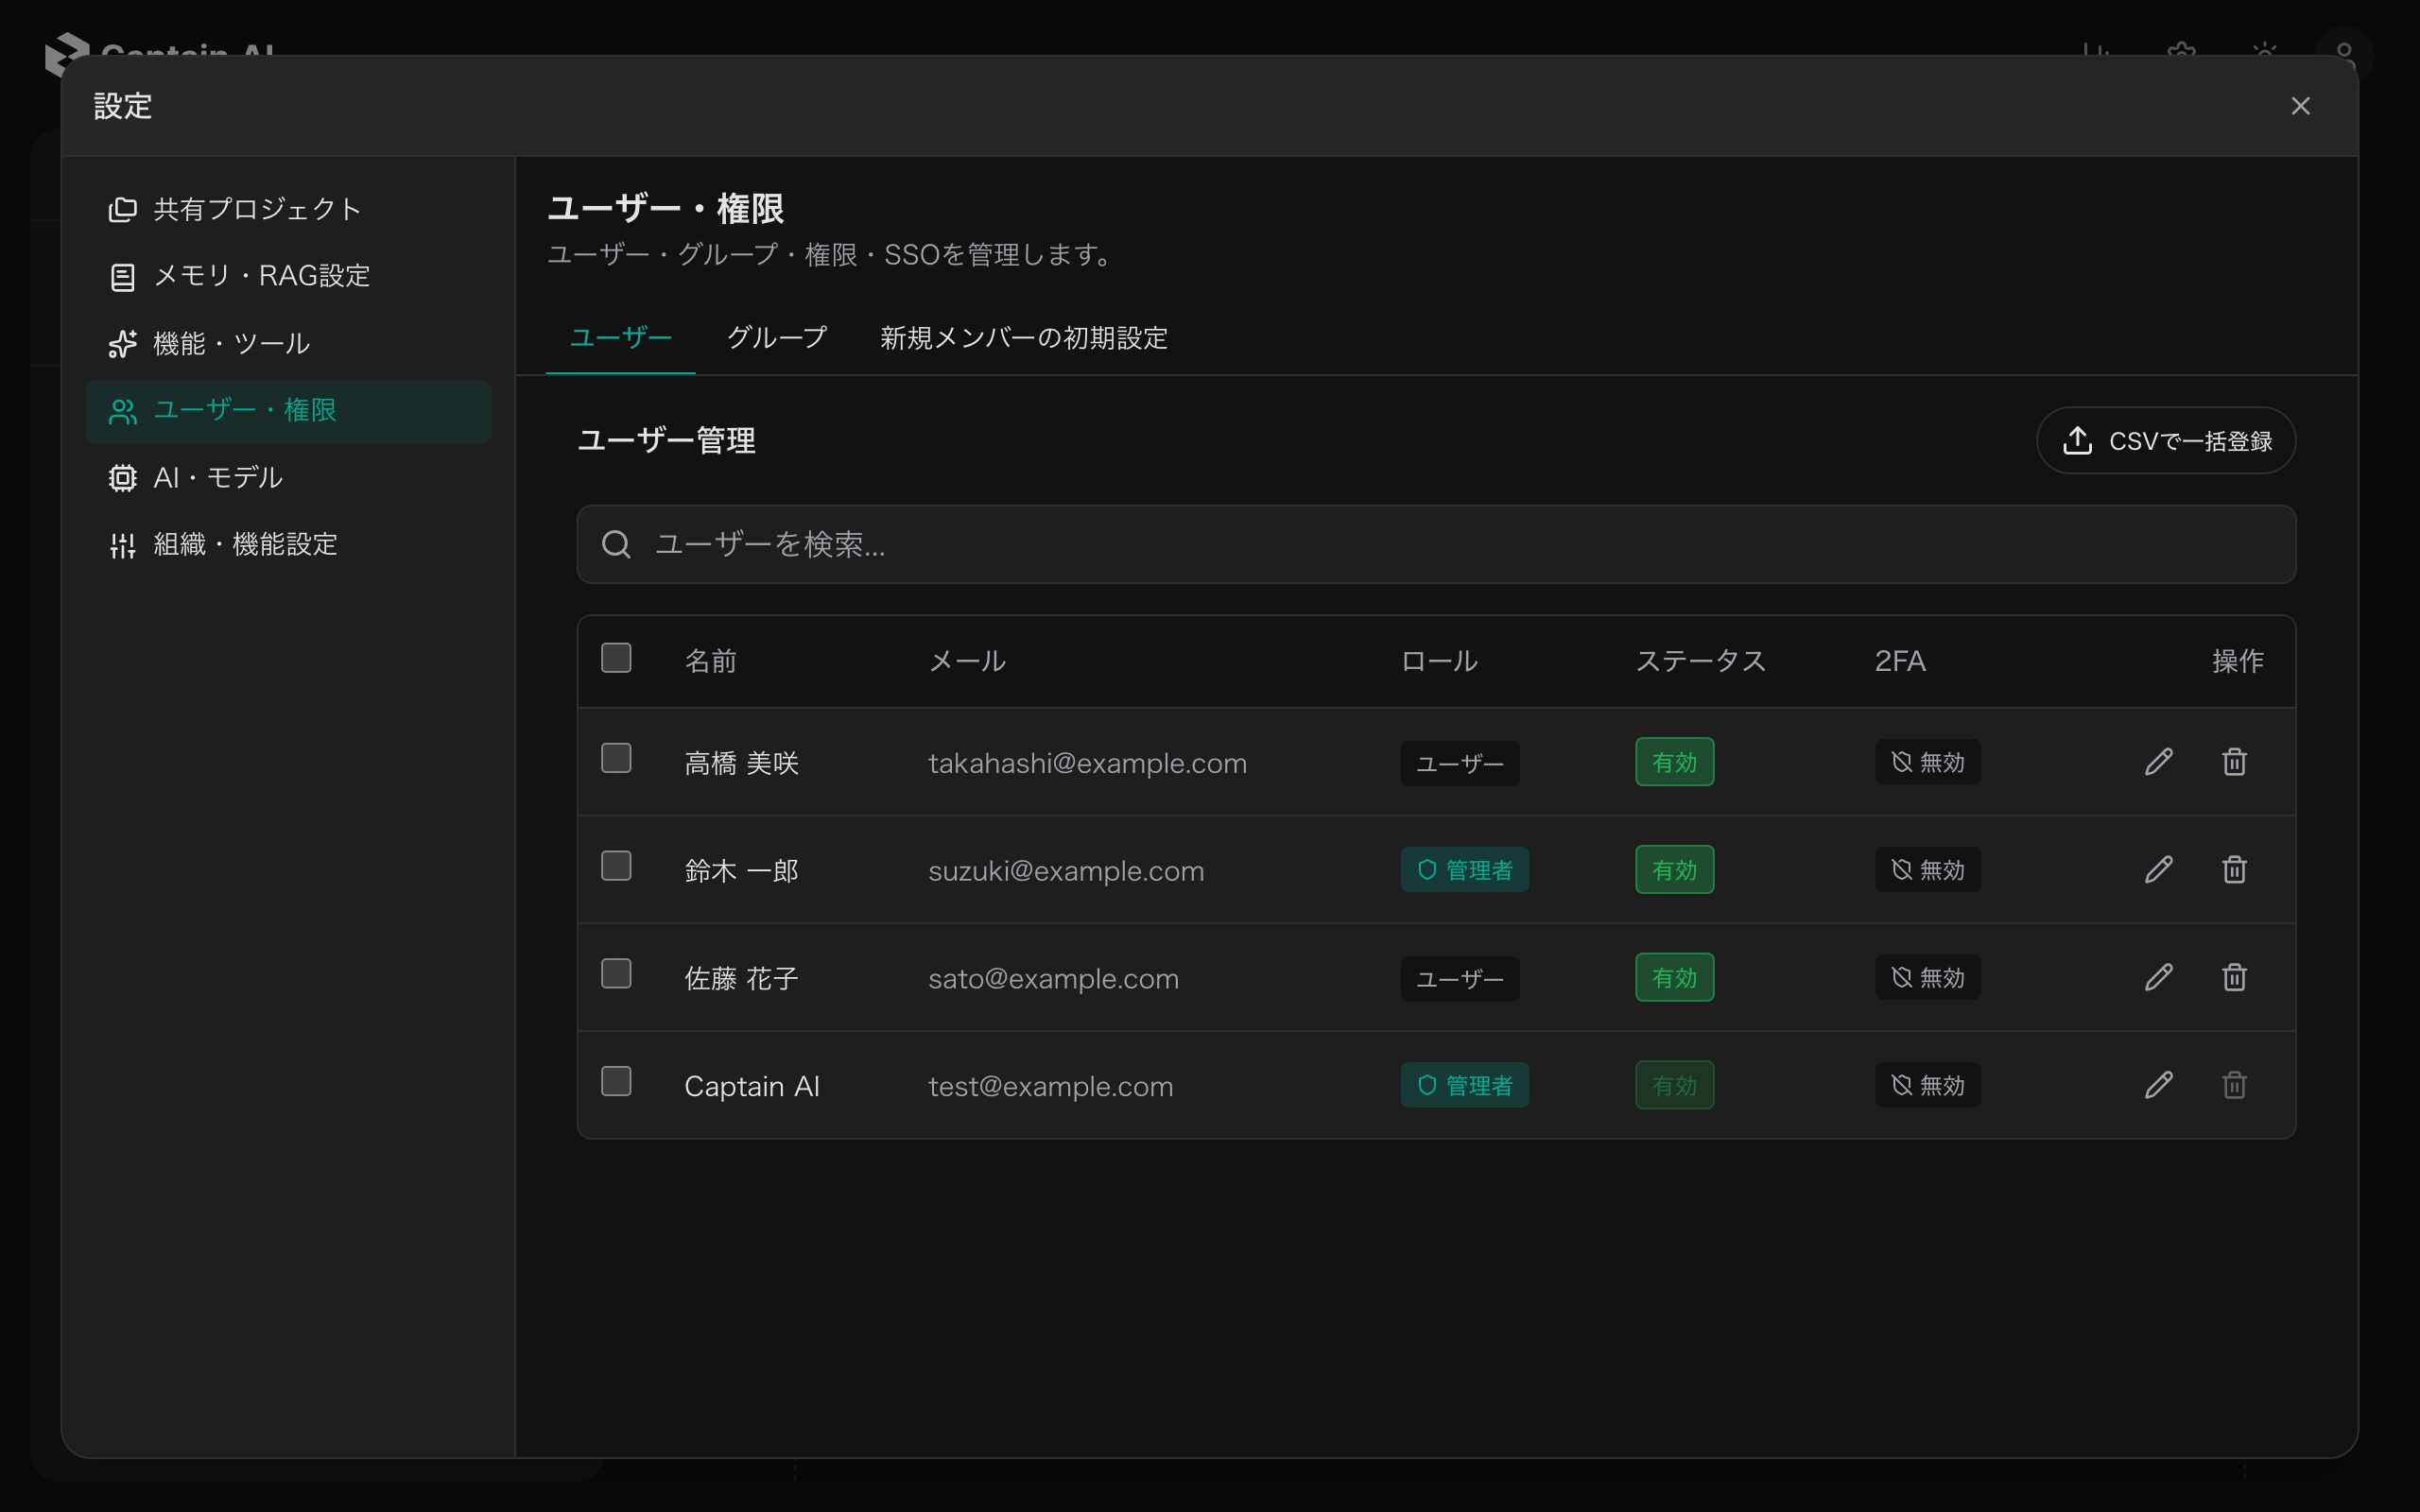
Layout
All users are shown in a table (paginated, 20 per page).
| Column | Description |
|---|---|
| Name | The user's display name. Users who have not responded to an invitation show an "Invited" or "Expired" badge |
| Login email address | |
| Role | "Admin" or "User" |
| Status | "Active" / "Inactive". Click the badge to toggle it immediately |
| 2FA | Two-factor authentication "Enabled" / "Disabled" |
| Actions | Edit, delete, disable 2FA |
Type in the search box at the top ("Search users...") and press Enter to search by name or email.
Adding Users
There are two ways to add users: invitations and bulk creation via CSV.
Inviting Users
Send an invitation link by email so new users can register themselves.
- Click the "Invite Users" button
- Enter the email address of each user to invite (name, email language (日本語 / English), and role are optional)
- To invite multiple people, add rows with "Add invitation"
- Click "Send Invitations"
- Review the result of each invitation on the results screen
Invited users register their account via the link in the email. Until a user responds, an "Invited" badge is shown next to their name in the list; when the invitation expires, it changes to "Expired".
Note: The "Invite Users" button appears only in environments where email sending is configured.
Bulk Creation via CSV
Register many users at once.
- Click the "Bulk via CSV" button
- Enter one user per line in the text area (blank lines and lines starting with
#are ignored)
# email,name[,password[,role]]
alice@example.com,Alice
bob@example.com,Bob Smith,,admin
carol@example.com,Carol,Init-Pass-123
- The columns are, in order: email address, name, password (optional), role (optional)
- If the password is omitted, a secure random password is generated automatically
- Set the role to
adminto register the user as an administrator (a regular user if omitted)
- Click "Bulk create"
- Check the number of created and skipped users on the results screen
Important: The list of auto-generated passwords is shown only once, immediately after creation. Save it with the "Copy" button and distribute the passwords to the users.
Editing a User
- Click the target user's row (or the pencil icon) in the user list
- In the edit modal, you can change the following:
- Name
- Role (User / Admin)
- Account Status (Active / Inactive)
- Click "Save" to apply the changes
Note: Email addresses cannot be changed. You also cannot change your own role or status.
Deactivating / Activating Accounts
Click the badge in the "Status" column of the list to toggle between "Active" and "Inactive" immediately. Deactivated users can no longer log in, but their data is retained.
Force-Disabling Two-Factor Authentication
Administrators can disable a user's 2FA, for example when the user can no longer use their authenticator app.
- Click the shield icon ("Disable 2FA") in the target user's row
- Enter a reason (required)
- Click "Disable"
Bulk Attaching / Detaching Groups
Change the group membership of multiple users at once.
- Select users with the checkboxes in the list rows
- Click "Bulk attach/detach groups", shown at the top
- Check "Add" or "Remove" for each group
- Click "Apply"
Deleting a User
- Click the trash icon in the target user's row
- Click "Delete" in the confirmation dialog
Note: A deleted user can no longer log in. Deletion cannot be undone. To suspend usage temporarily, use deactivation instead of deletion.